After a much needed break over the holidays and some quality time with the family, I decided it was time to reflect on 2012. I had promised that I would work harder to produce post for the blog and I managed to keep it up for a quite a while. Unfortunately, this last semester was brutal(the worst in all my time in college) and this blog suffered a little. I still had a great time writing and thinking up of new posts. Hopefully 2013 will be different and full of wonderful new things. Anyways, here's a look back at my favorites from last year.
Showing posts with label d.i.y.. Show all posts
Showing posts with label d.i.y.. Show all posts
Tuesday, January 1, 2013
Friday, September 14, 2012
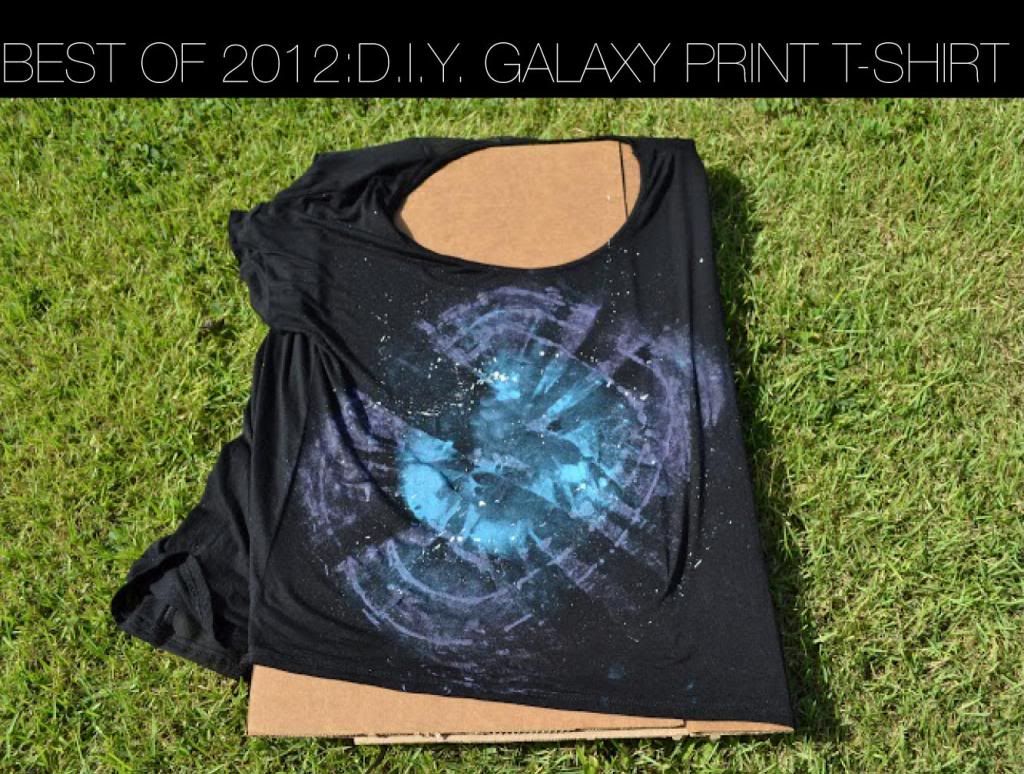
D.I.Y: Galaxy Print T-shirt
I've been looking at some galaxy print stuff on the internet for a while now. Even though I've been oddly transfixed by the stuff, I haven't been able to commit to buying a piece. I find that most things are ridiculously overpriced (last item I checked was a pair of leggings that went for a whopping 80 pounds!). Knowing this I set out on a mission to find a good tutorial. I couldn't help but noticed that most tutorials use bleach to create the effect. I didn't really like this technique because I think that handling the bleach is pretty complicated, one wrong move and your clothes disintegrate. After experimenting for a while, I realized that you can create a very similar effect just using fabric paint, a sponge, and some very clever blending.
Saturday, August 11, 2012
D.I.Y: Faux Turban
Summer isn't over yet, so I thought it would be fun to create a fun and easy to wear faux turban. I created one with an elastic band so it'll be sure to be no fuss. Let's get to it! (Image heavy post ahead)
Friday, July 13, 2012
D.I.Y: Neon Headband
The summer is as hot as ever and the neon trend is still going strong. Here's a twist on the nautical rope headband. So let's get to it!
I wasn't able to find neon colored rope so I bought nylon rope and freshened it up with two coats of acrylic paint.
1. Cut three 18-inch strands of rope and glue them together. Cut an 8-inch strand of elastic.
2. Sew on the elastic.
3. Glue a small piece(around 4 inches) of ribbon and wrap around a couple of times to cover up the stitches.
4. Braid the rope and after you're done repeat the above steps on the other side. Your finished headband should look like this.

Tuesday, June 12, 2012
D.I.Y: Fringe Necklace
Before you begin this project make sure you have enough chain (I used up the majority of this pack which is about 100 inches.)
1. Measure and cut a 16 inch strand of chain. Attach a lobster claw clasp and a hoop at the ends.
2. Cut as many 3 inch strands of chain as you can. Group the strands into pairs.
3. Fold the necklace in half and mark the middle. Attach the first strand. In my case, I made the center strand a bit longer that the rest (about 4 inches instead of 3).
4. Continue attaching strands on both sides until you're happy with the results.
Here's the final look:
Tuesday, December 20, 2011
D.I.Y: Simple holiday gift idea
There's a way to get gifts for all of the fashionistas in your life without breaking the bank. It's as easy as 1, 2, 3. These simple bracelets look elegant and can be worn separately or stacked. Here's what you'll need:
- metallic beads
- clear beads
- assorted black and grey small beads
- elastic cord
- scissors
1. Measure the elastic cord using your wrist. Make sure you leave 2 extra inches so it'll be easier to tie the ends.
2. Layout your pattern and string the beads.
3. Tie the ends.
Wednesday, October 5, 2011
D.I.Y: Vintage Inspired Earrings
It's very hard to find nice thrift or vintage stores in Puerto Rico, so I decided I was going to find a way to create vintage inspired pieces. I've been looking at vintage patterns to hopefully be able to sew some of my own pieces but I decided it was best to start small. I think that vintage inspired earrings were the best starting point. I found a very easy way to create vintage inspired earrings using assorted buttons. Here's what you'll need:

- buttons
- earring pieces(you can find them at most craft stores and they usually have the back and closing part)
- cutting tool or pliers
- hot glue gun

- With the cutting tool or the pliers cut the back of the buttons. There's also a specific tool you can buy but any good set of pliers should do the trick. Make sure you cut the back of button completely or else the back of the earring won't lay flat.
- Put a drop of hot glue a little bit off center towards the top of the button. I used to glue in the center of the buttons, but then I noticed that the buttons didn't lie quite as flat on the ear as earrings normally do. You should be very careful when gluing because once the glue dries it's very hard to remove the piece. Make sure to remove the excess glue.
Voila!! Wait for the glue to dry and wear your cute button earrings.
Subscribe to:
Posts (Atom)


